Welcome to the Fancy Girl blog!

I am so glad you are here! Join me in my journey for all things fancy and fun!

Find out more about Michelle and how the Fancy Girl blog (formerly Glamourviews) got it's name and the goals for this site.

Learn more about the best of the best and try something new!.

Learn all the lastest in beauty trends from a Pro Makeup Artist

Makeup, hair and beauty tips for Prom, parties and everday. Especially for Teens.

Wednesday, February 29, 2012

Awaiting Spring Makeup Tutorial


With the weather being like it has been it's making me crazy for spring!   There are so many amazing spring trends this year.  And one of them is the still going bohemian style.  Add a metallic smokey eye and berry lips and you have your updated 2012 edition.  Read on to get the how to on Tatyana's easy to create look!

To get this look:

Makeup....

MAC eyeshadow in Antiqued all of the lid, crease and lower lash line.
MAC blush in Melba
MAC lipstick in Russian Red "stained" on the lips.  (To stain, apply lipstick with a lip brush and press your lips firmly together.  Blot with a tissue.  Don't use any lipliner.  This will give it a slightly bleeded effect, thus looking stained.)
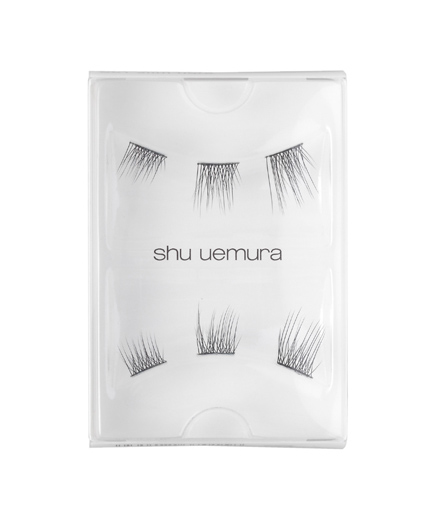
Red Cherry #747S cut into demi lashes.

Hair....
Tatiana came with her hair in a bun slightly damp.  This caused the hair to have a natural curly look with out ever touching an iron.  She just gave it a little life by scrunching it with her hands right before the shoot.

Where to Buy....

MAC Cosmetics www.maccosmetics.com
Red Cherry Lashes www.madamemadeline.com

The Collaboration....

Photographer:  Jasmine Lee Viray
Model and Hair: Tatyana Fomina
Makeup:  Michelle Kinkaid

Check out my PRO Makeup Artist website here!


Monday, February 27, 2012

How I Curl My Hair - Date Night Version


Scroll down for the how to video!

Good morning my darlings!  I put together a video tutorial for you based on requests on how I curl my hair.  This version is for dressier days, not so much formal, but for when you go out with your girlfriends, date night, or for whatever floats your boat.  It's a really simple technique but a bit repetitive since you have to curl smaller sections all over your head.  I don't claim to be a licensed hairstylist, this is just how I do it.

Here's what you will need:
1" Curling Iron
Setting Spray, I used Sebastian Shine and Define www.ulta.com
Teasing comb
Clips to section your hair
Hairspray if you need it
And that's it!

The Notes:
1.Take down hair from the nape of your head and pile the rest up on the top with clips.
2.Separate this section in two.  Spray setting spray on one section, then split in two.  Curl both sections.
3.Repeat on the other side.
4.Take down hair on the sides, pile rest up and clip.
5.Spray one side, make 2-3 sections and curl each one separately.  Repeat on the other side.
6.Take a section from the back, tease, spray, separate in 2 and curl each new section. 
7.Repeat further to the front of the hair.
8.Your final section in the front is separated by your part.  Spray, curl, repeat.
9.Play around with your curls and separate them till you get your desired look.
10.Finish off with hair spray if you have a hard time keeping a curl.
And you are done!

Here's the how to video:


To watch in a bigger screen, after pressing play, click on the YouTube logo to watch in YouTube. Or click here.
To get the makeup look that I am wearing in the video, check it out here.
I hope you found this helpful!  If you like what you are reading, please share and subscribe!  Thanks!

Visit my PRO Makeup Artist website here!


Friday, February 24, 2012

De-Stick Sticky Lipgloss

ICY Pictures, Images and Photos

Happy Friday everyone!  Don't you find it crazy annoying when your lipgloss is super sticky?  I do!  Especially when the wind is blowing or when I want to kiss my babies.  Or when I'm taking a drink and that awful sticky film won't wash off the cup.  I think your hubby's or boyfriends will agree with this too. 

But lipgloss, especially the sticky ones (most shine) look so amazing!  I am a self professed lipgloss-oholic.  I can't live without it!  Well here's a quick little tip for you that you will love!

Rub and ice cube around your sticky lips and this will dilute the gooeyness. 

Did this work for you?  Do you have any tips and tricks you would like to share?  Comment below!

Check out my PRO Makeup Artist website here!

Wednesday, February 22, 2012

Feathered Lashes!! OMG so GORGEOUS!


This is probably one on my most absolute favorite photoshoots ever!  These lashes were so fun and the hair was immaculate.  Although it was hard for the models to get into character (they kept giggling   It's hard being so serious!) they did an amazing job!  Warren the photographer is so light and happy all the time, made for some fun times.  I can't wait to do another lash shoot.  Lashes are my passion!

Janneth's Look: 
Eyes-
MAC Cosmetics Vex eyeshadow all over the lid concentrated and softly brought up to the brow bone. 
MAC eyeshadow in Humid in the crease, heavy.  And applied to the lower lash line.

Cheeks- MAC Bronzer

Lips- MAC Lipstick in Freckletone


Tatyana's Look:
Eyes-
MAC Cosmetics All that Glitter's eyeshadow all over the lid and up to the brow bone and around the tear duct.
MAC Cosmetics Mulch eyeshadow in the crease, copy to the lower lash line.

Cheeks- MAC Bronzer

Lips- MAC lipstick in Cherish

The lashes are from a Trade Show that I went to.  But you can find these very similar at www.ebay.com

Get MAC Cosmetics here.

Photographer:  Warren Hearl of Imagigraphics
Hairstylist: Carrie B. Mac Hair
Makep Artist: Michelle Kinkaid - www.michellekinkaidmakeup.com
Models: Janneth and Tatyana Fomina

Check out my PRO Makeup Artist website here!

If you like what you read, share and subscribe!  Leave a comment so I know you stopped by!

Tuesday, February 21, 2012

The Three Section False Eyelash Technique


Scroll down for the how to video!

When you are first learning how to apply false eyelashes, especially strips, it can be a very frustrating experience.  Maybe it didn't stick properly on the corners.  Or you didn't get it perfectly on the lash line.  There are many kinds of issues that can happen.  So here is an easy way to get those lashes on perfectly.

 If one corner starts to lift, you just rework that section and leave the others alone.  And by working one section at a time this gives you greater control on how close and acurately you get the lashes on.

This technique may take a little longer to prep since you are cutting, and then glueing each section.  But the time it saves in having to keep redoing the work will save you a headache. 

What you will need:
Lashes of your choice
Eyelash Glue (I like to use Duo found at most drug and retail stores like Target)
Small pair of sissors

The Cliff Notes:
1. Take your lash off of the container.
2. Measure the lash on your eye and determine if you need to trim to fit your eye.  Cut where needed. (Tip, cut on the outer edge of the lash, not the inner lash.)
3. After you have trimmed, if needed, cut the lash in 1/3's. 
4. Glue each peice with a thin strip of lash glue and place glue side up back on the carton to get tacky. (Tip: Make sure you place your lashes back in order so you don't get confused.  Start with the inner first, then middle, then outer.)
5. By the time you have each sectioned glued, the first section should be tacky.  If not, blow on it for a few seconds or wave it in the air.
6. Start with the inner corner and place it where you want it.  Pat down gently with the end of an eyeshadow brush or an orange stick.
7. Repeat with the middle, then the outer.
8. Repeat these steps on the other eye.
And your done!

To learn the traditional way, check out this video here.

If you don't want to do the cutting part yourself you can also look into Shu Uemura's Slim Partial's $13.00 and found at most department stores, since they already have done it for you. 

Check out the how to video below!


Get the amazing lashes shown in the top photo at Eyelashes Online.

The lashes that I used are the Red Cherry #747M found at Madame Madeline.

Check out my PRO Makeup Artist website here!

If you like this post please share and subscribe!  Leave a comment so that I know you stopped by!

Monday, February 20, 2012

Get the Look - Sultry Neutral Bridal

Here's Nicole my lovely Serrano Country Club Bride!  Her Wedding look was Sultry Neutral.  She looked absolutely stunning especially in black and white!  This look is so easy to get and all the products are available from MAC at all their locations.  Except the lashes which are from Red Cherry available at Madame Madeline.  Keep reading to get the details on how to achieve this look for yourself!

Get this look:

Eyes- MAC Cosmetics eyeshadow in Mulch all over the lid.
        MAC Cosmetics eyeshadow in Shroom on the brow bone.
        MAC Cosmetics Fluideline eyeliner in Blacktrack.
        Red Cherry #1 Lashes.
Cheeks- MAC Cosmetics blush in PeachyKeen.
Lips- MAC Cosmetics lipstick in Strength.
        MAC Cosmetics lipliner in Hover.

Location: Serrano Country Club
Photographer: Shin Kicker Studios
Hair Stylist: Stacey Barton of Look Sharp Salon
Makeup Artist: Michelle Kinkaid - http://www.michellekinkaidmakeup.com/

Check out my PRO Makeup Artist website here!

Wednesday, February 15, 2012

Makeup Tips from a Three Year Old

Yep, that little one belongs to me!

 I turn my back for just a few minutes and BAM! I've got a crazy mess on my hands. My 3 year old gets into her brother's Desitin and apply's her "makeup".  And not to mention that big box of wipes she pulled out in her attempt to cover up what she did. That's what she told me she was doing. How in the world could I get mad at that?  I couldn't help but laugh. Which was just more encouraging to her. I asked her what her method was and she says this. "I put my lips on, and my cheeks on. I'm a Princess." Simple techniques from a hilarious 3 year old. I also noticed that she has some mad highlighting skills with Desitin applied on the bridge of her nose and on her forehead. She is definitely a girl after my heart!

Enjoy the simple things and have a good laugh!  XOXO

Visit my PRO Makeup Artist website here!

Tuesday, February 14, 2012

Casting Call for Teen Models for a Prom Shoot!

Attention all Teens or models that can pass as a Teen!  We are casting for a series of shoots that are teen related. 

Prom


Makeup for Glasses


Senior Portraits


Braces?  Makeup for Braces


Easy Everyday Teen Makeup for School


Party Makeup for Teens

Embracing Differences: Different Styles for Your Personality
Each shoot will have professional hair, makeup and photography.  There may also be video done as well for instructional purposes or promotional purposes only.  This video will be edited as a tutorial and shown on YouTube.   This is a trade for shoot, meaning you get all the professional services and edited photos for free in exchange for your time.


You MUST have your own wardrobe and accessories.  You must also be able to provide or help provide props for the agreed on concept.  You must be able to come to Folsom CA. 


Parent signature of the model release will be required if you are under the age of 18.  It is recommended and encoraged to bring a parent chaparone. 


You do not need to be a professional model to do this shoot.  We encorage anyone to apply and we are looking for all types of girls.  So let your friends know about this shoot too!  In fact, we would love to get some group shots.  To apply, please message me on www.facebook.com/mkmakeupartist or at michellekinkaid@gmail.com.  Send your picture, availablity and contact information.  Also leave any other additional information you would like to share such as your ideas of concepts for the shoot. 


This shoot is open to other hairstylists and photographers.   The weather has been amazing so we will be shooting in the next few weeks.

Above Photos:
Hair: (Top Photo) Roxanne Plavan (All Others) Michelle Kinkaid
Makeup: Michelle Kinkaid
Photographer: www.silverdaisiesstudios.com
Models: Marquel, Elizabeth and Ashley
Check out my PRO Makeup Artist website here!


Friday, February 10, 2012

Valentines Day Inspired Makeup Tutorial

Get the how to video!  Scroll down!
With Valentines Day right around the corner I thought I would create a romantic look with a bold pink lip for you to try.  Bold and bright lips are all the rage for this spring and now is a great time to start implementing this look.  Berries and coral's are especially popular.   The cool toned pink lips really made my blue eyes POP!  Here are the steps and the makeup used:

Eyes:
Urban Decay eyeshadow in Sin (a pale shimmer pink) all over the lid concentrated.  And softly applied up to the brow bone. Also apply this color to the inner tear duct area and inner third of the lower lash line.
Urban Decay eyeshadow in Busted (a dark grey purple) in the outer V and brought down to the lower lash line in the outer third only.
Urban Decay YDK (a high shimer medium toned purple pink) over Urban Decay Busted that you just applied and bring it softly to the middle thrid of the eye.
*All of the Urban Decay eyeshadows are from the Naked 1 and 2 palettes. 
Red Cherry #747M lashes cut in thirds (I have a tutorial coming out on this technique.  But for now do the normal application method of lashes.  To see a tutorial on how to do that here.)
Mary Kay Ultimate Mascara (black)
MAC Superslick Liquid Eyeliner in On the Hunt (darkest black).  Apply this over the strip lash line.

Face: 
Temptu Airbrush foundation in 005 and 006.  Any foundation in your color will do.
MAC Plum Foolery (a warm purpley color with a hint of shimmer) on the cheeks.

Lips:
MAC Beet (a bright red pink) Lip Liner
MAC Girl About Town (a bright pink with a hint of purple) Lipstick
NYX Mega Shine Lipgloss in Beige (soft purple tinted pink), to turn the high voltage pink down a slight notch.

Where to buy:
Urban Decay Shadows: www.sephora.com or www.ulta.com
MAC Cosmetics: www.maccosmetics.com or www.nordstrom.com
Red Cherry Lashes:  www.madamemadeline.com
NYX Cosmetics: www.cherryculture.com
Temptu Airbrushing:  Pro's www.temptupro.com or www.ulta.com for the pods.

**Just added:  Here's the video tutorial!! 
 

To watch in a bigger screen, after pressing play, click on the YouTube logo to watch in YouTube.  Or click here.

Happy Valentines Day to YOU! 
XOXO, Michelle

Check out my PRO Makeup Artist site here!


Thursday, February 09, 2012

Dinair Water Based Airbrush Makeup and Machine Review


In my pursuit of finding the perfect airbrush system for my growing Makeup Artistry business I have been researching and researching endlessly for some time now.  One of the biggest players in the airbrushing community is Dinair.  Time and time again they popped up and I heard really good things about them.  And importantly I saw that fellow Makeup Artists were using them on their clients.  So I had to give it a try.  By far, Dinair was one of the most competitive priced kits out on the market.  You really got your bang for the buck.  Especially if you get in on one of their specials that they often hold (sign up for email notifications) you really get a lot for your money.  I happened to get mine right before Christmas.  I ordered the Personal / Pro kit in Opal White.  The deal was Free Shipping AND I got an additional 4 colors that I got to choose.   Also included in the kit:


8 Glamour foundations
Cleaner
Airbrush gun
Airbrush Compressor in one of the standard colors
Eyebrow stencils
Training materials
Training DVD
Sample Concealer
Eyeshadow Shield
Small Moist and Dewy
Samples of Air Tan
Training Foundation


What a deal!  And all this for only $229.00.  They also give you a one year warranty and one free lesson after you view the DVD for additional support. 

It only took 2 days for the kit to be delivered, at Christmas time.  Very impressive.  I finally got to test this baby out.  It was really easy to assemble and so simple to learn how to use.   The opal white looked more silver than what I had thought.  This little compressor was truly so light and small.  This would be so easy for me to travel with.  And the color range was great.  I instantly found my correct shade. What you see on the outside of the bottle is basically what you will get.  Just a few drops in the gun and you have a flawless face.  I even attempted at doing eyeshadow and blush with out even practicing first and it looked awesome!  The bronze shimmer is amazing on your lids and has beautiful sparkle.  You can even use this as contour and adding a shimmer to your face.  And I used the blushes on my lips as lipstick followed by Moist and Dewey as a lipgloss.  Amazing!  However airbrushing your lips doesn't last very long.  But longer then regular lipstick. 

Now for the Cons:  As a Makeup Artist it is important to me to not be exclusive to any brand.  I want to get a big color range and try different finishes.  This compressor will not work with the silicone based (S/B) foundations.  The compressor is not powerful enough to pump out the thicker formula.  However the gun will hold up.  I had hoped to keep the tiny compressor and use the gun from the other brand.  But it's the opposite in this case.  Not the gun, it's the compressor.  Be fair warned.  Dinair will except returns in 30 days but you will have to pay the shipping back and a 15% restocking fee.  I also found that the water based formula was very drying.  And I have oily skin.  So just put in a few drops of Moist and Dewey with the foundation and you should be good.

However, with that said, this system is great.  And the makeup is beautiful.  They have a huge color range and lots of different finishes.  Including the Paramedical which is great for covering tattoos, scars, burns, etc.  And the size is perfect for on the go or for someone that doesn't have a ton of space.  I would recommend this for a Makeup Artist starting out in airbrushing and I would recommend this to the everyday gal wanting a flawless finish daily with a system that is easy to use. 

Please go to www.airbrushmakeup.com to learn more about Dinair.

Check out my PRO Makeup Artist website here!

Wednesday, February 08, 2012

Get this Look! Modern Day Marilyn Monroe Makeup


One of my most favorite shoots ever!  We used the Dolce and Gabbana with Scarlett Johansson ads as our inspiration to create these Marilyn Monroe - ish pictures.  Kristina Lindenburg was absolutely the best model for this.  She easily captured the subtle sexiness that we were going for!  With the right lighting and photography from Cole Garcia of Shin Kicker Studios and hair by Stacey Barton, Makeup by me, it was a winning combination! 

An easy way to get this look:

Eyes-  This is a glamed up 50's version.  So we didn't go skimpy here.  We used MAC All that Glitters eyeshadow all over the lid and MAC Espresso eyeshadow in the outer v and the crease.  Add drama with bold black eyeliner and false eyelashes.

Lips- Go with a dark berry look.  Here we used MAC Lipstick in Rebel.

Face- Keep the foundation Matte looking and add a very soft berry pink blush.  We used Mary Kay Strawberry Cream blush. 

Tip:  Make sure to fill in the brows for a slightly bold look. 

Photography: Shin Kicker Studios
Hair: Stacey Barton of Look Sharp Salon
Makeup: Michelle Kinkaid www.michellekinkaidmakeup.com
Model: Kristina Lindenburg

Check out my PRO Makeup Artist Site Here!

Tuesday, February 07, 2012

Upcoming Changes to the Blog!


Glamourviews is going through some changes right now.  So don't be alarmed and think you went to the wrong place!  It's getting all new graphics, banners, buttons and more.  Even a new name!  That's right!  I am coordinating the blog brand to the business brand so that it all goes together nicely.  I will also be adding new types of blog posts, so it won't all be about beauty.  Some of the new posts may include organizing, DIY, and decorating tips.  As well as some stuff for Mom's, group challenges and giveaways.  But the main focus will still be beauty with the biggest emphasis on Makeup Artistry.  So stay tuned for all of these exciting things! The biggest help I can get from you now is to share this blog with people you know so that I can reach my goal of 100 readers!  There will also be a Pinterest button installed on the blog so that you can share the pictures and ideas.  But for now you can use your own installed Pin It button on your browser.  Thank you everyone for you support!  XOXO


Check out my PRO Makeup Artist website here!

Monday, February 06, 2012

Easy Soft Smokey Look for Brides!


While the guys were watching the Super Bowl downstairs, my girlfriends and I were upstairs playing around with some makeup looks.  This look I did on Kim is perfect for a smokey bridal eye.  It's not over powering or slutty.  Just soft and sultry.  The key to this look for a bride is to do a neutral colored lip to balance out the eye.  Here are the products we used and where so you can recreate this look yourself!  By the way I did the hair too! 

Eyes:
MAC Paint Pot in Constructivist on the lid only, don't go above the crease.
MAC Mulch eyeshadow over the Paint pot
MAC Shroom eyeshadow just on the brow bone. 
*Blend out the line with a blending brush with no color on it.
MAC Fluidline in Blacktrak for the liner
Red Cherry Lashes in 747S

Face:
Make Up Forever HD Foundation in 118
Mary Kay Concealer in Beige 1
MAC Melba blush on cheeks
E.L.F. Cosmetics HD powder to set.

Lips:
MAC Shy Girl Lipstick
MAC Subculture Lip Pencil

And there you have it!  A really simple easy to do Bridal Makeup Look!
Thanks Kim for being my model!  XOXO

Check out my PRO Makeup Artist website here!